According to research by Pew Research Center, Americans with disabilities are 19% less likely to own a desktop or laptop computer than non-disabled Americans. As a software engineer, I could not imagine my life without my laptop or desktop computer. However, the reality is that it can be difficult to use a computer effectively if you have a disability that prevents you from moving the mouse. A promising solution to this could be to use eye-tracking to allow you to control your computer’s mouse. In fact, several solutions exist already that implement this eye-tracking-based control of a computer, like Precision Gaze Mouse. Unfortunately, these eye-tracking solutions typically require expensive equipment, like the Tobii eye tracker, that might not be affordable for some people. As a result of this, I set out to create a more cost-effective version of eye-tracking-base mouse control software with 2 of my classmates at the University of Florida, Christopher Wilson and Nalin Mehra, as our senior design project using machine learning that requires only a webcam that comes with most laptop computers.
The Process
To work efficiently, we split the project into 3 different modules: eye detection, screen interpolation, and UI + inter-thread communication. I was in charge of the UI and inter-thread communication module, but each of us was intimately familiar will all modules of the project. For the project, we decided to use Python because of its robust support of machine learning libraries.
Eye Detection
To perform eye detection, we implemented a machine learning pipeline using OpenCV that is as follows:
- Pull an image from the webcam
- Detect a face using Haar Cascades and crop the image to the face
- Detect eyes using Haar Cascades and crop the image to the eyes
- Separate the pupils and whites of the eyes using binary thresholding
- Smooth out the image using median blur filtering
- Perform blob detection to focus on the cluster of black pixels (the pupils)
This pipeline was run for every frame of the program, up to the maximum framerate of the laptop webcam (typically, 30 frames per second). Because this is a computationally intense pipeline, it was crucial that this pipeline was run on a separate thread from the user interface to reduce any perceivable lag.
Once we have the calibration data (corresponding pupil and screen coordinates), we can train a regression model that we can use to try to predict future screen coordinates based on pupil coordinates. We tried a variety of different regression models but felt like a linear regression was the best fit for our data.
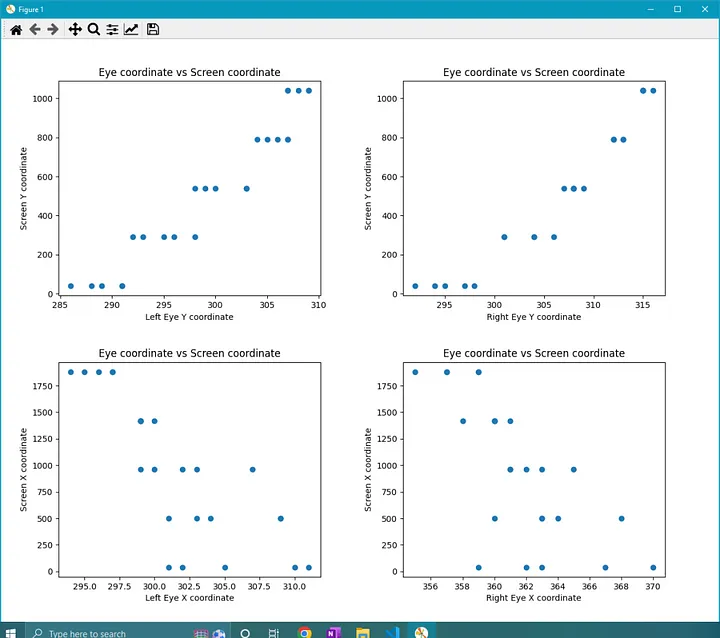
Despite the linear regression model working the best, the results were still not to our liking. In practice, relying on a few pixels of data from a webcam image for moving a mouse across an entire screen is simply bound to have problems. Our original goal was to simply look at a spot on the screen and have our cursor move to that spot. Unfortunately, our machine learning pipeline and regression models simply were not consistent enough to make this work properly. As a result, we decided to pivot to a simpler method using joystick-like mouse control to still meet our requirement of allowing our users to control their mouse without using their hands.
The idea was simple — if your eyes are to the left of their resting point, the mouse will start moving left. If they are above their resting point, the mouse will start moving up. If your eyes were at their resting point, the mouse would stop moving so that you could perform a mouse click. To determine the resting point, we would compute the average location of the pupil coordinates during the calibration process and draw boxes around that area.
Speaking of mouse clicks, we decided that the easiest way to implement clicking was by checking if the user blinked their eyes intentionally. If our pipeline did not detect your pupils for ~40 frames, we would register an intentional blink and click the mouse.

Our final screen interpolation process was as follows:
- Capture calibration data (corresponding pupil and screen coordinates)
- Train the “joystick” interpolator (determine the resting area)
- Receive pupil coordinates from the ML pipeline every frame
- Use the “joystick” interpolator to determine where the pupils are (inside of the resting area or outside)
- If the pupils were outside of the resting area, begin moving the mouse in that direction
User Interface & Inter-Thread Communication
To create all of the UI for the project, we opted to use pyside6, which is an implementation of the cross-platform UI solution Qt, for Python. Layout and design with pyside6 were not as intuitive as CSS for the web, but after an initial learning process, building the various UI components was relatively easy. Pyside6 uses a class-based widget system. Basically, each UI element was considered a widget, and you could combine various smaller widgets into one large widget. Typically, this meant creating widgets for buttons, text, and other controls and combining them inside of a window widget.
For inter-thread communication, the idea was simple. We would have two threads — one processing thread that would run the ML pipeline and screen interpolation, and another UI thread for running the UI. To facilitate communication between these threads, we used pyside6’s Signals and Slots. Signals are variables that can be emitted (optionally with data), and slots are effectively callback functions that run when a signal they are connected to is emitted. The most important Signal/Slot combination was passing the webcam image from the processing thread to the UI thread so that a live video feed could be displayed. This was a simple as creating a Signal that could be emitted with image data, having the processing thread emit the webcam image, and having a slot of the UI thread to display that image data.
The Results
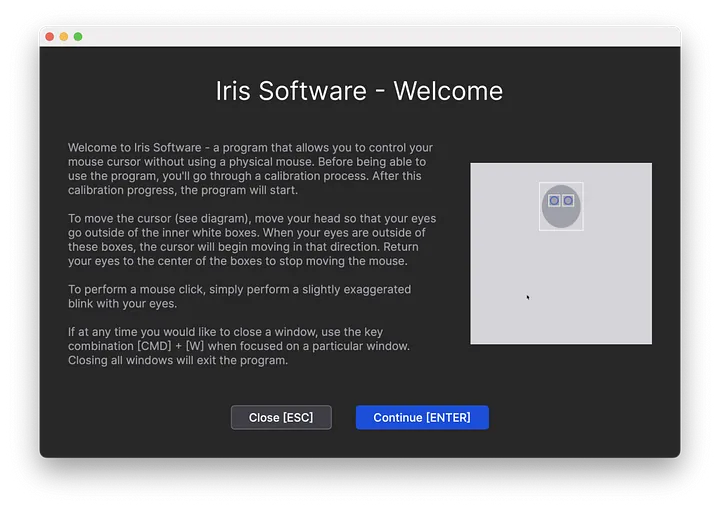
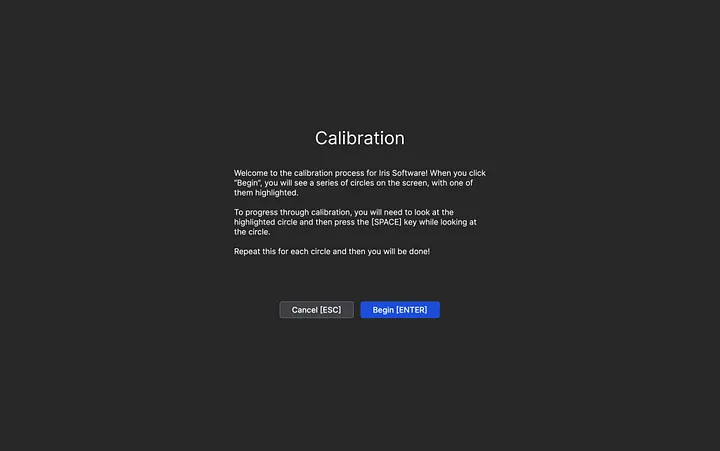
Instructions Window
Shown when the user launches the program.
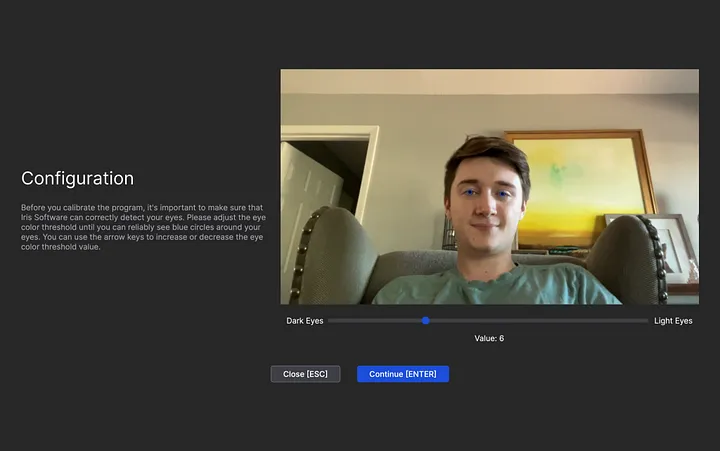
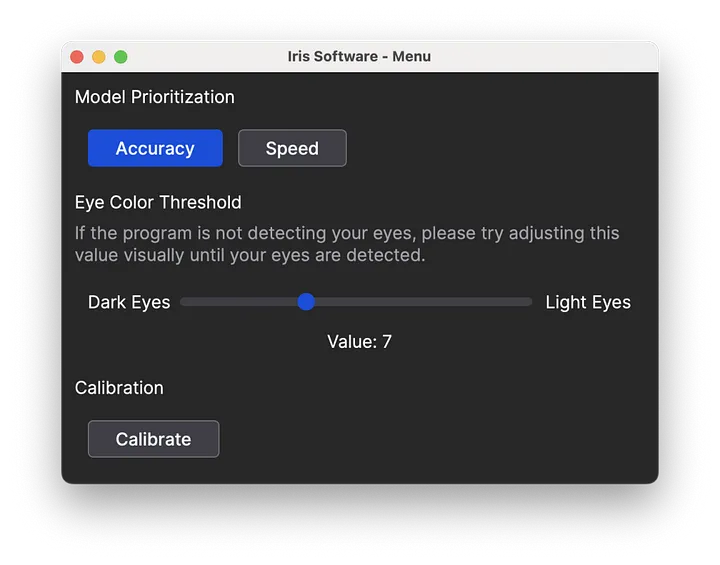
Configuration Window
Shown to allow the user to adjust the eye color threshold so the program can properly detect pupils. We found that this setting varied based on eye color and lighting conditions.
Calibration Window
Runs when the user launches the window without any saved calibration data.
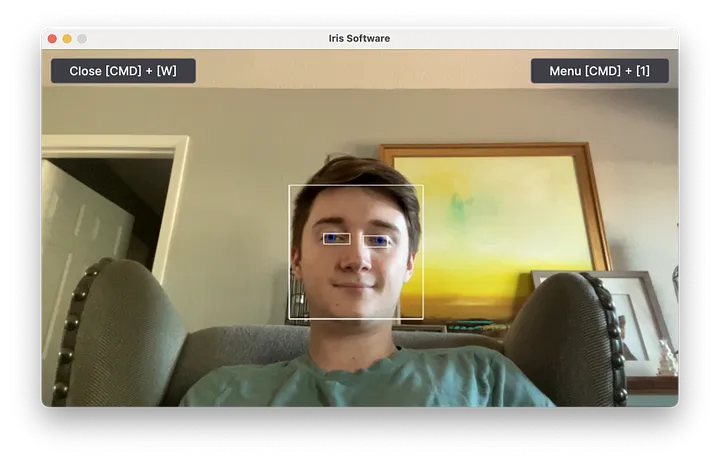
Main Window
Shows when the program is actually running, showing a live video preview.
Menu Window
Allows the user to adjust various program settings and re-calibrate the program.
Conclusion
While we weren’t able to accomplish our initial goal of just looking at a point on the screen and having our mouse move there, we were still very satisfied with the overall progress of the project. In the future, we thought it would interesting to improve upon our project by:
- Exploring common hardware we could use to get better data for pupil detection, like iPhone Face ID sensors.
- Revising and improving interpolation to move the cursor where the user is looking on the screen.
- Adding blink pattern detection to differentiate between left/right clicks and additional shortcut actions.